I veckan kom Microsoft med beskedet att de planerar att lansera SQL Server på Linux för…
Introduction
In this blog post I will give you a step by step guide on how to deploy an SQL Server container using ADS on Linux.
Containers are a neat little thing, and being able to deploy SQL Server in a container is really useful. It can be used for testing/development because it’s so fast and easy to set up identical SQL Servers on multiple machines. But SQL Server on containers is also used in production environments, you can set up an Availablility Group between two containers, for example.
Another cool new product I have been playing with the last couple of weeks is “Azure Data Studio”, or ADS for short. It’s like SQL Server Management Studio, but cross platform. Which I find pretty exciting because I like Linux. It also has a ton of new features, one of these being able to deploy SQL Server in a container, straight from ADS. You can install ADS on other Linux distributions, such as RHEL and Suse, but for this guide I will be using Ubuntu 18.04.
I also noticed tried this with ubuntu 16.04, but I ended up having trouble with the Python SSL module.
What you need:
- An installation of Ubuntu desktop 18.04, virtual machine or installed on iron
- Internet connection
- A web browser
Patching the machine
- First of all, we want to open the terminal:
ctrl + alt + t - Make sure that all the packages are up to date
sudo apt -y update && sudo apt -y upgrade
Installing Docker
https://docs.docker.com/v17.12/install/linux/docker-ce/ubuntu/
Docker is a program used for deploying and managing containers.
Docker works on both windows and linux. But for deploying sql sever containers, I’ve found
that installing and running docker on linux works a bit better. I have had troubles getting
“Volumes” to work correctly when I run Docker on Windows, for example.
We are going to use the Community version of docker, docker-ce, here are the steps for installing it.
- Install some dependencies:
sudo apt install apt-transport-https ca-certificates curl software-properties-common - Get and add the gpg encryption key for safe transportation of packages:
curl -fsSL https://download.docker.com/linux/ubuntu/gpg | sudo apt-key add - - Add the docker repository for ubuntu:
sudo add-apt-repository "deb [arch=amd64] https://download.docker.com/linux/ubuntu $(lsb_release -cs) stable" - Update package cache and install the docker package:
sudo apt update && sudo apt install docker-ce
You now have Docker installed on your system.
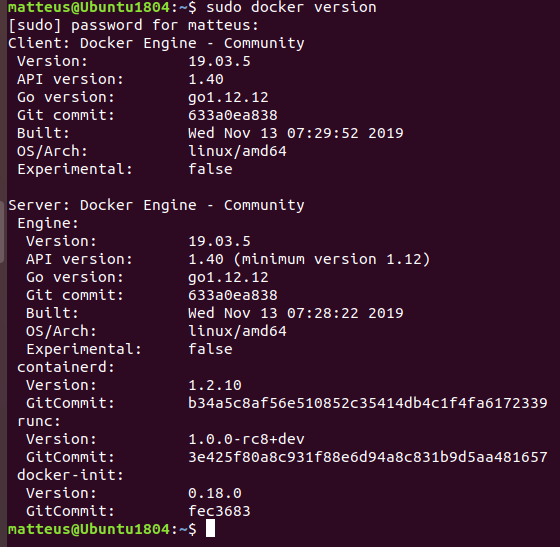
- We’ll of course want to try out our newly installed package, let’s see if we can see the version:
sudo docker version
Notice how we used “sudo” before the command.
sudo is a command that’s basically “Run as administrator”, but in linux.
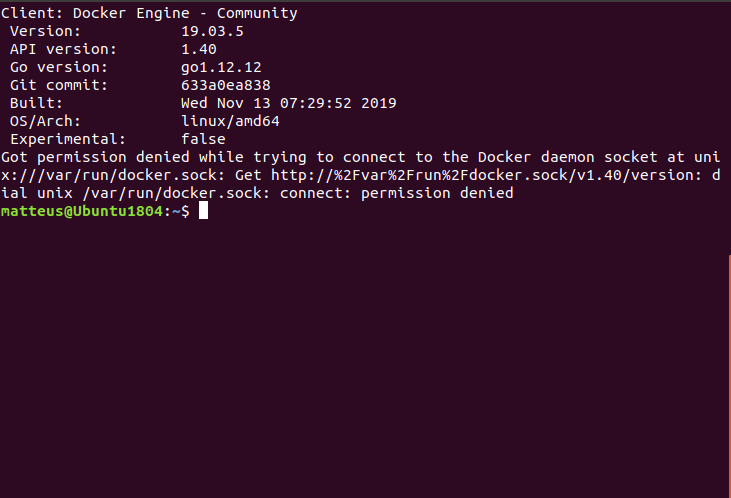
- In this case, we need sudo to get the “Server” part of the output. If we run the command without sudo, we’ll get an error:
docker version
This creates a problem, because ADS wants to be able to run docker command, but we don’t want to run ADS as root. We solve this by adding your user to the group “docker”.
- This allows you to run docker command without sudo. This is how you add your user to the docker group:
sudo usermod -aG docker $USER - Restart your machine and log back in.
- Run this command and you should see “docker” as one of the groups:
groups
Installing Azure Data Studio
https://docs.microsoft.com/en-us/sql/azure-data-studio/download?view=sql-server-ver15
Azure data studio is a cross platform database tool, much like SQL Server Management Studio, but with more features.
It is also very simple to install, here is how you do it:
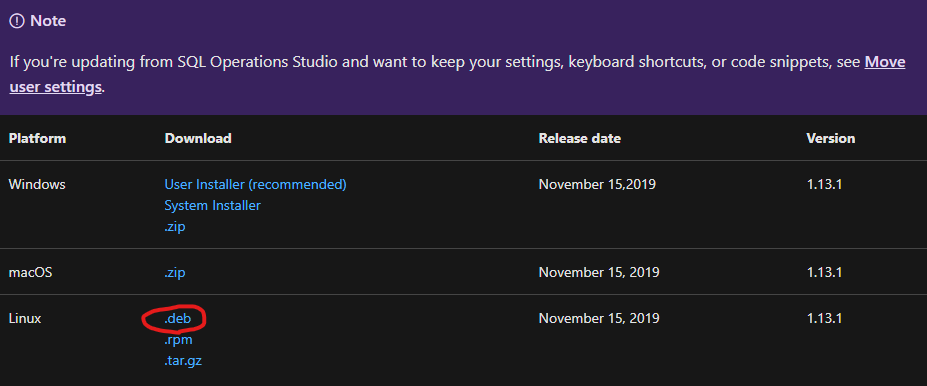
- Go to the link below and download the .deb file:
https://docs.microsoft.com/en-us/sql/azure-data-studio/download?view=sql-server-ver15
- Navigate to your home directory:
cd ~/Downloads - Make sure the file is there:
ls
- Install the package, just replace the version number:
sudo dpkg -i ./azuredatastudio-linux-<VERSION-NUMBER>.deb
Azure Data Studio is now installed on your system
Deploying the container
- The first step is starting ADS, just type in the command below into to terminal:
azuredatastudio - Use Ctrl + shift + D to open the "Connections" tab
- Press the three dota next to "CONNECTIONS", press "Deploy SQL Server"
- Choose version of SQL Server, 2017 or 2019
- Enter container name, sa password and port
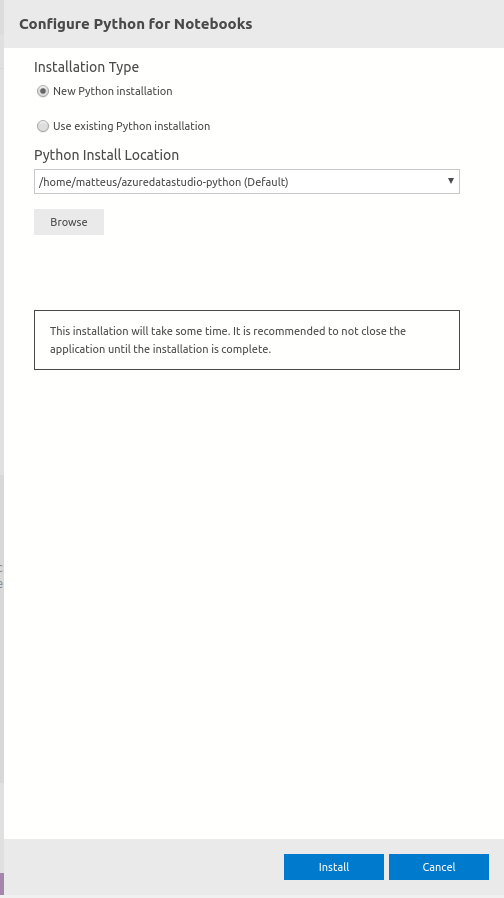
- Choose "New Python installation", then press "Install"
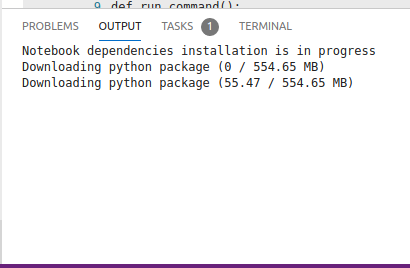
- Wait for Python to finish installing
- Upgrade Python packages
- Now you just have to press the little play button in the top left of the boxes.
Here is where you connect to the new SQL Server, just press play and then press the link that appears:
You are connected to your new SQL Server in a container.
If you have any questions I'll be happy to help, just email me at matteus.andersen@sqlservice.se and I will get back to you as soon as possible.

